How to Fix High CPU Usage on Windows 10
How to Check CPU Usage on Windows 10
To check for high or near 100% CPU usage on your Windows 10 system, simply follow these steps:
How to Fix High CPU Usage on Windows 10 How to Check CPU Usage on Windows 10 Why is CPU Usage High or 100%? Method 1: Restart Application Management Service Method 2: Identify Issues using Event Viewer Method 3: Update Windows Method 4: Turn Windows Notifications Off Method 5: Turn off P2P Share Method 6: End High CPU Usage Processes Method 7: Disable or Uninstall Third-Party Programs Method 8: Run Windows Defender Scan Method 9: Change Power Plan Settings to Default Method 10: Change Registry Settings Method 11: Reset Windows
Type Task manager in Windows search box and launch it from the search result, as shown.
Click on More details visible at the bottom of the screen, if you get a blank screen.
Switch to the Performace tab on the Task Manager window, as depicted.
Check the Percentage written under CPU or Utilization, as shown highlighted in the above pic. If your CPU usage is high or nearing 100%, continue reading!
Why is CPU Usage High or 100%?
Running Background processes: Windows computers need background processes that complement and support the main processes to run. Therefore, the more software your computer contains, the more background processes are required in order to run these. This may lead to a 100% CPU usage issue. Netscvs Process: The Netscvs process, also called Svchost.exe, is a critical Windows process that causes high CPU usage. This process, coupled with other processes, can cause high CPU usage. Application Management: This process runs on Windows to troubleshoot problems with computer systems on a particular network. The WMI Provider Host, or Wmi.PrvSE.exe, is a critical process that can overpower the CPU. Third-party Antivirus Program or Virus: A third-party antivirus program can cause high CPU usage. On the other hand, if there is a virus in your system, it can lead to further CPU usage and slow down your computer.
Listed below are various solutions for how to reduce CPU usage on Windows 10.
Method 1: Restart Application Management Service
As explained earlier, the WMI Provider Host can cause 100 % CPU usage. To fix this, you need to restart the service using the Services application as follows:
Type services in the Window search bar and launch it from the search result, as shown.
Right-click on Windows Management Instrumentation in the Services window and select Restart or Refresh, as depicted.
Repeat the same process for Windows Management Service.
Method 2: Identify Issues using Event Viewer
If CPU usage caused by the WMI Provider Host could not be reduced, then you need to identify the problem using Event Viewer, as explained below:
Type Event Viewer in Windows search bar. Launch it by clicking on Open.
Click on the downward arrow next to each file while navigating the following file path:
From the middle pane of the Event Viewer, look for errors, if any.
For each error, note down the ClientProcessId, as shown highlighted.
Now, launch Task manager as explained in Method 1, Step 1.
Then, go to the Details tab and click on PID to arrange the given processes according to increasing order of ClientProcessId.
Use the ClientProcessId you noted in Step 4, and identify the process associated with it.
Right-click the Identified process and select End task. Note: Below is an example shown using Google Chrome.
Also Read: Fix Service Host: Diagnostic Policy Service High CPU Usage
Method 3: Update Windows
If you do not update Windows operating system regularly, outdated drivers can lead to high CPU usage on your PC. Here’s how to fix high CPU usage by updating Windows to the latest version:
Type Updates in Windows search box. Launch Windows Update Settings from here.
Click on Check for updates button from the right pane, as shown.
Windows will search for and install available updates, if any.
Restart the PC and check if the issue is resolved. If not, try the next fix.
Method 4: Turn Windows Notifications Off
When Windows notifications are turned on, it can cause significantly high CPU usage. This implies that turning it off could help relieve some load off. Here’s how to fix high CPU usage:
Type notifications in the Windows search box. Click on Notification and Action Settings from the search results, as depicted below.
Turn the toggle off for the option titled Get notifications from apps and other senders.
Check if the CPU usage has reduced by following the steps outlined under How to check CPU Usage on Windows 10.
Method 5: Turn off P2P Share
The Peer-to-Peer or P2P Sharing feature helps send & receive files over the internet. If enabled, it can increase CPU usage. Here’s how to reduce CPU usage on Windows 10 laptop/desktop by turning it off:
- Type Windows update settings in the Windows search box and click on it as shown.
2. Click Delivery Optimization available from the left-hand side menu. 3. Turn the toggle off for the option titled Allow downloads from other PCs to disable P2P sharing.
Also Read: How to Fix High CPU Usage by System Idle Process
Method 6: End High CPU Usage Processes
You can use Task Manager to identify and shut down processes that are using too many CPU resources. Many laptop manufacturers like Intel host a dedicated page to this effect. Given below are the steps to do so.
Launch Task Manager as explained in Method 1, Step 1.
In the Processes tab, click on CPU as highlighted below. This will sort all the running processes in order of CPU Usage.
Identify the Process that has High CPU usage. Right-click on it and select End task. Here’s how to fix high CPU usage due to SoftThinks Agent Service on Dell PCs by freeing up CPU resources. If you wish to remove more load off the CPU, implement the methods explained below.
Method 7: Disable or Uninstall Third-Party Programs
Windows comes with an inbuilt virus and threat protection called Windows Defender Firewall. It is capable of protecting your computer from vicious attacks by viruses and malware. In case you have third-party antivirus software installed on your computer for added security, you can disable it. Such programs may be causing near 100% CPU usage and slowing down your PC. We shall discuss the steps in detail, to disable as well as uninstall third-party antivirus programs. Option 1: Disable Third-Party Antivirus Program
- Launch the third-party antivirus program that you use on your PC. Note: We have used Avast Antivirus for illustration purposes.
- Go to Protection Settings in the left pane. Disable Firewall by toggling it Off.
Option 2: Uninstall Third-Party Antivirus Program
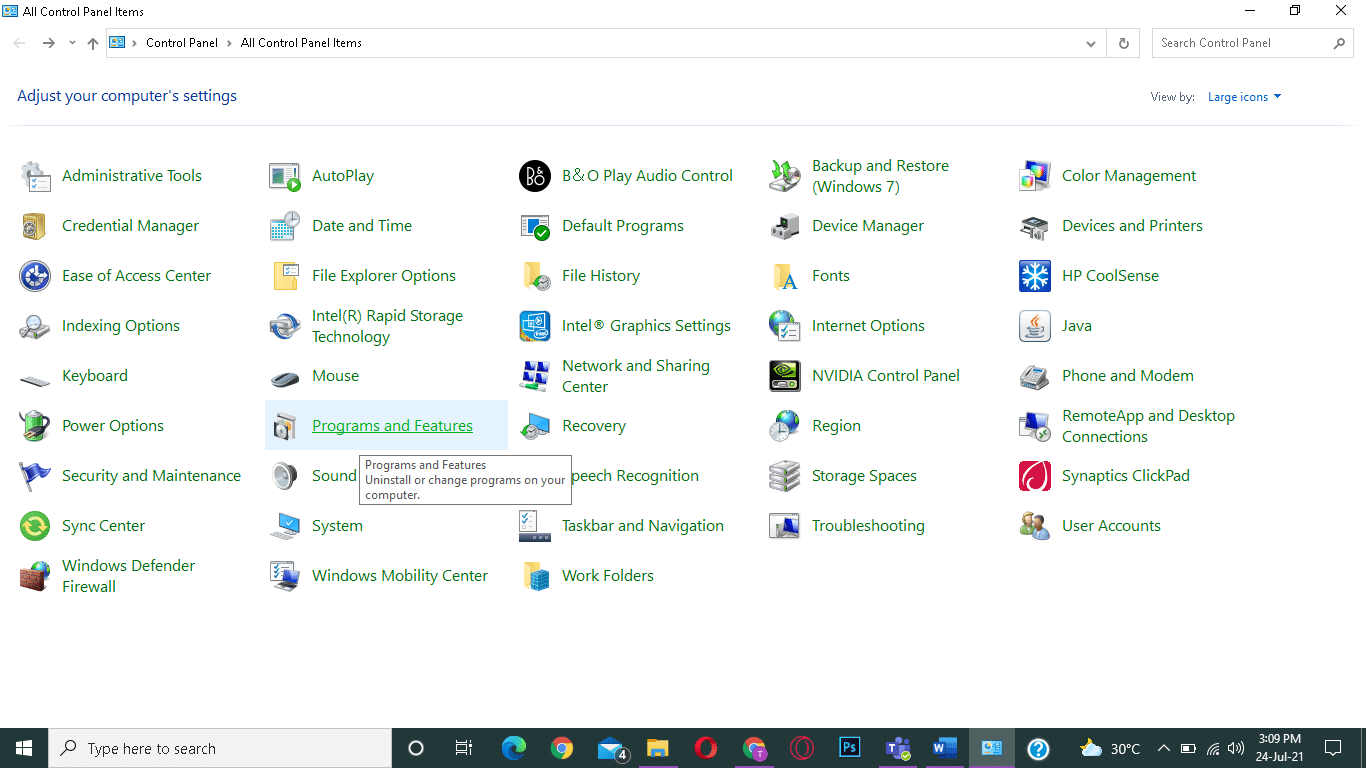
Launch Control Panel from Windows search, as shown below.
Click on View by > Large Icons and then, select Programs and Features, as depicted.
Click on Avast and then, select Uninstall.
If the above method did not work for you, there might be malware in your system. Clearly, you will now need to run a scan and eliminate threats using Windows Defender to fix high CPU usage. Also Read: Fix Windows Audio Device Graph Isolation high CPU usage
Method 8: Run Windows Defender Scan
Windows Defender will scan all the files in the system and check for malware. If threats are found, you can then remove them from your device. Here are the steps to scan your PC:
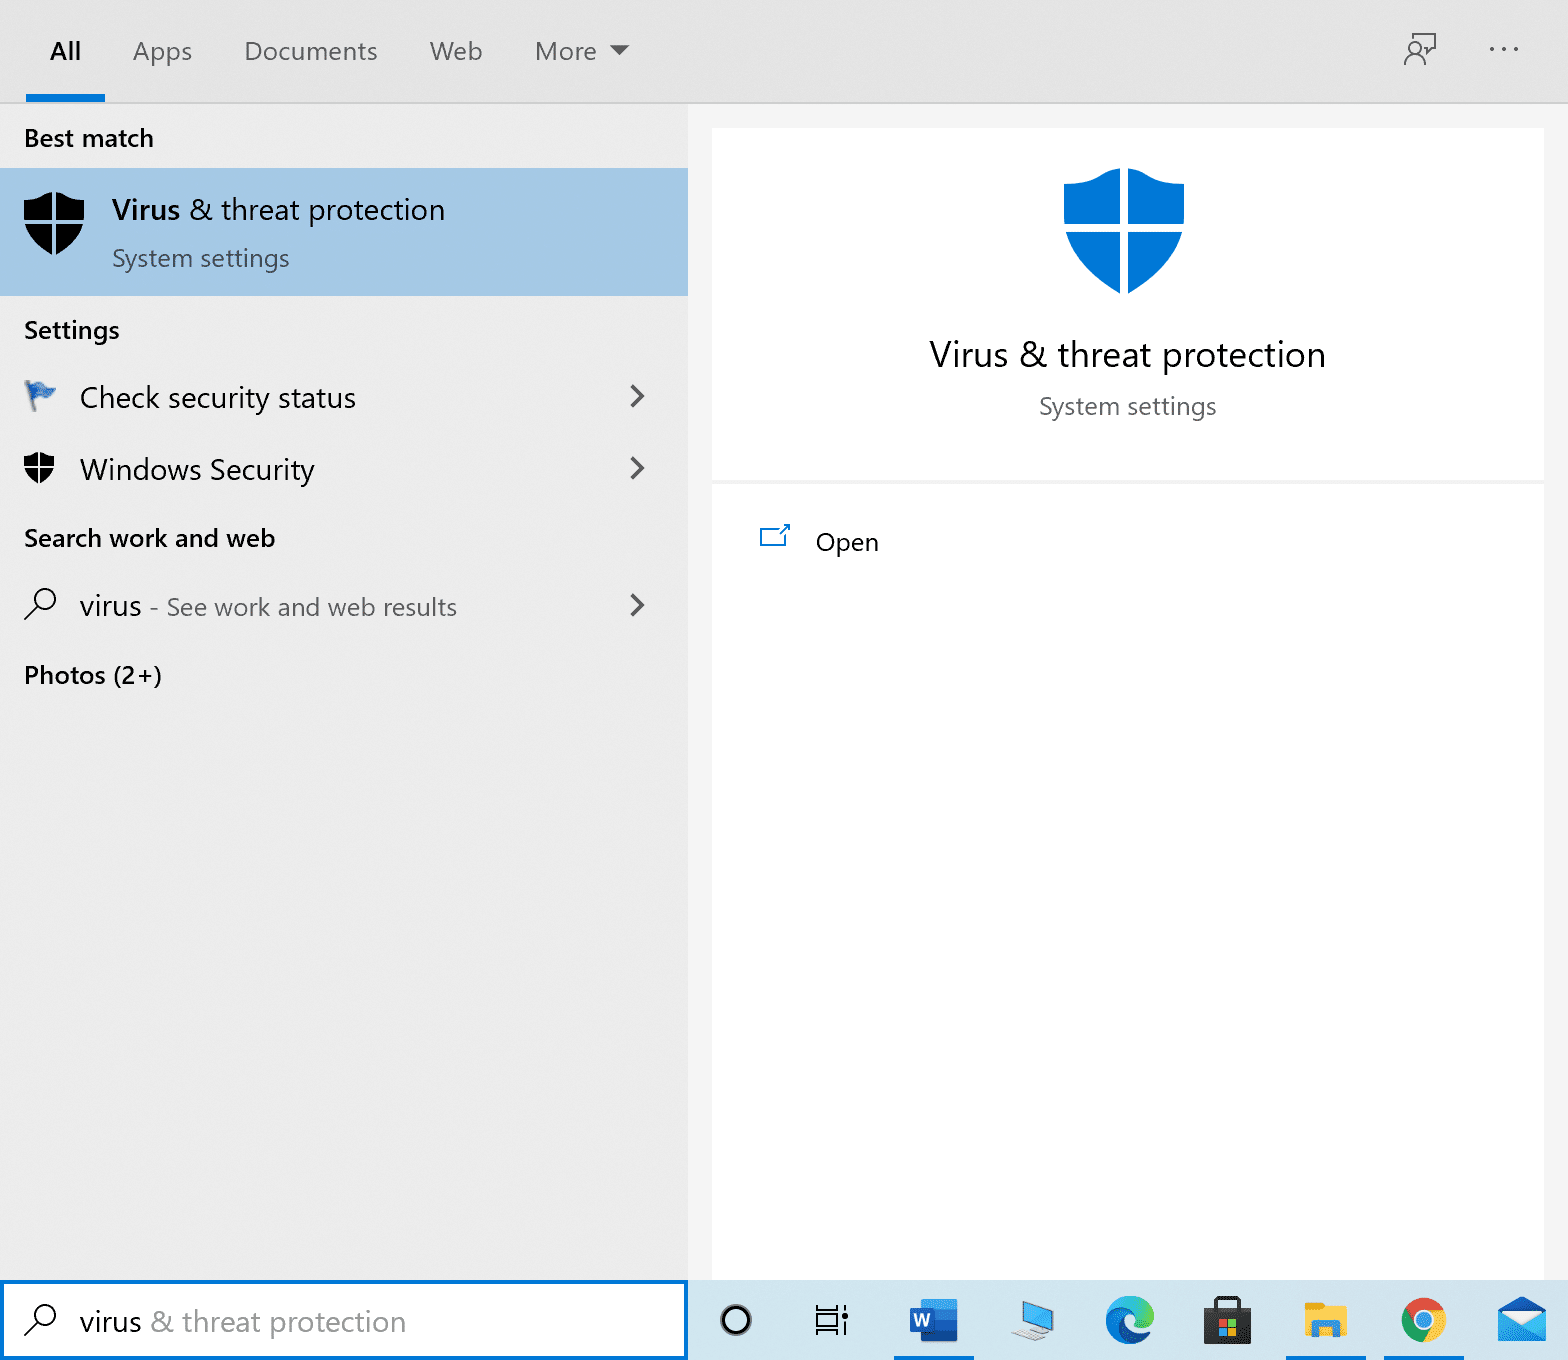
Type Virus and threat protection in Windows search. Launch it by clicking on it.
Click on Scan options as shown below.
Select Full Scan and click on Scan Now, as highlighted.
Note: Make sure that your laptop is charged and nobody disturbs the scanning process in between. Full Scan checks all files and running programs on your hard disk. This scan could take longer than an hour.
Method 9: Change Power Plan Settings to Default
If the power plan of your PC is set to Power Saver Mode, then your computer will experience high CPU usage. Here’s how to fix high CPU usage by rolling back the settings to default, as explained below:
Type Control Panel and launch it from Windows search option, as shown.
Click on View by > Small icons. Then, go to Power Options, as depicted.
Select Balanced, if your PC is on Power Saver mode.
Now, click on Change plan settings, as shown highlighted.
Here, click on Restore default settings for this plan.
Lastly, click Yes to confirm and apply these changes.
Also Read: Fix Desktop Window Manager High CPU (DWM.exe)
Method 10: Change Registry Settings
If you are a frequent user of Windows Cortana, then you may experience 100% CPU usage. If you are willing to sacrifice some Cortana features, here’s how to reduce CPU usage in Windows 10:
Type Registry Editor in Windows search option. Launch it from here.
Navigate to the following path:
Now, right-click on Start from the right pane of the window.
Select Modify from the drop-down menu, as depicted.
Type number 4 in the Value data field. Then, click on OK to save changes.
After you complete the above process, all Cortana features will not work. However, CPU usage should be reduced. You can now check for it by implementing the steps under How to check CPU usage on Windows 10 heading.
Method 11: Reset Windows
If all of the above-mentioned solutions did not work, the final solution left is to reset your Windows system. Note: Back up all the essential files on your system before you begin to reset your computer.
Type reset in Windows search box and click Reset this PC, as shown.
Click on Get started under Reset this PC, as shown below.
Then, click on the Keep my files option in the next screen.
Follow the on-screen instructions and wait for the process to complete. Windows OS will reset and all possible issues will be rectified. Recommended:
Fix Mouse Wheel Not Scrolling Properly Fix Sound Keeps Cutting Out in Windows 10 How to Enable User Account Control in Windows Systems Fix Command Prompt Appears then Disappears on Windows 10
We hope this article was helpful and you were able to fix high CPU usage on Windows 10. Let us know which method worked the best for you. Also, if you have any questions or suggestions regarding this article, feel free to drop them in the comments section below.


![]()


